Accounting > A/R > Recurring Charge > Managing Recurring Charges
Use this page to create new and manage existing Recurring Charges. A Recurring Charge is any charge that is to be added to the owner's ledger on a regular basis such as; Assessments or Late Fees.
NOTE- A recurring charge that applies to an individual account can be temporarily suspended on the Find Account > Recurring Charge tab.
To Add a New Recurring Charge
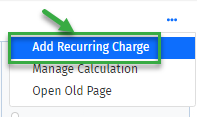
Step 1. Select Add Recurring Charge from the Page Actions drop down menu.
Step 3. Complete the fields in the window below.
Association – Choose the Association from the drop down list.
Name - Enter a name for the recurring charge. This is a friendly name that will appear on the screen but not on the actual charge when it is added to the owner's ledger.
Trans Type - Select the Trans Type from the dropdown. The Trans Type must already be set up on the Association GL Setup page before it can be used on the recurring charge. CLICK HERE for more information.
Frequency - Select the frequency for the recurring charge from the dropdown menu.
Description – Enter a description of the charge that will show on the owner’s account.
Active- Check this box to activate or uncheck to deactivate the charge.
NOTE- Deactivating a charge will stop it from being used in the future, but existing charges will continue to be visible.
Start Date- Enter a date for the charge to begin use.
End Date- Select a type of End Date for the charge.
No End Date- Select if there is no End Date.
End after ____ Occurrences- Select if the charge should run for a set number of times. For example, if a Special Assessment is being billed out over time.
End By- Select and enter an End Date if the charge stops by a specific date.

Amount Type - Specify how the owners will be charged.
Flat rate - Charge is the same amount for all owners

Calculation – Charge is based on a calculation as set up on the Manage Calculation page. CLICK HERE for more information.

% Ownership – Charge is based on percentage ownership (common area ownership and/or limited common area ownership). This information is stored by unit and can be entered on the Manage Unit page. Clicking on the % Ownership radio button will open additional fields, shown in red below.

Unit Area – Charge is based on unit area. This information is stored by unit and can be entered on the Manage Unit page.

Account Lookup – Charge values are stored at the owner level. This information must be set up on the owner’s account.

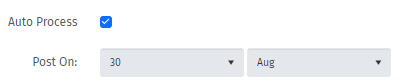
Auto Process- Check this box to have the charge automatically processed on the specified day. Leave unchecked to manually process Recurring Charges.
NOTE- When Auto Process is selected, additional fields will appear.
Post On – Enter date for the charge to be billed to the owner’s account and the general ledger.
NOTE- This option is only available if the Auto Process flag is checked.
Run On Enter date to run the charge. You can choose to run the charge on the same date that it needs to be posted, or you can choose to run at a different time, either before or after the post date.
Apply To- Specifies which accounts/units are to receive the recurring charge. Choices include:
All current accounts - All current accounts in the association are included. You can exclude certain accounts by specifying them on the Account Exception" tab.
NOTE- Make certain to click on “Exclude Non-Owner”.
Specific accounts - Only the accounts specified on the Accounts tab are eligible for the charge.
NOTE- Specific account charges only apply to the specified accounts. If the property is sold, the new owner will not receive the charge as it is assigned to the previous account.
Accounts Field-

Specific units -When Specific Units is selected in the Apply To field, you can add units using this drop down menu. Check the box next to the Units you want subject to this Recurring Charge.
Unit Field-

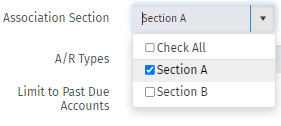
Association Section - When Association Section is selected in the Apply To field, you can add a Section or Sections using this drop down menu. Check the box next to the Sections you want subject to this Recurring Charge.
Association Section Field-
Association Section / Unit Type - The Recurring Charge can be set up for both the Section and Unit Type variables so that in a specific section this charge only applies to these unit types. Select the appropriate section/unit type(s) from the lower section/unit type pool and click the up arrow to move the selected section/unit type to the pool of section/unit type(s) to which the charge does apply.
NOTE- To use this option, the following items must be set up:
Association Sections - on the Association > Manage Associations- Section tab CLICK HERE for more information.
Unit Types- on the Firm > Manage Types > Manage Unit Type page CLICK HERE for more information.
Units must be attached on the Association > Manage Unit page. CLICK HERE for more information.
Section/Unit Type Field-

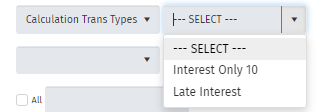
Calculation Trans Types – Will use the set up from the Accounting > A/R > Recurring Charge > Manage Calculations page.
Association Unit Type - Use this option to limit the Charge to a specific Unit Type or Types. Select the appropriate unit Types by checking the box or boxes in the drop down menu.
NOTE- To use this option, the following items must be set up:
Unit Types- on the Firm > Manage Types > Manage Unit Type page CLICK HERE for more information.
Units must be attached on the Association > Manage Unit page. CLICK HERE for more information.
Unit Type Field

Account Exceptions- Use the drop down menu to view a list of Owners within the Association. To exclude an owner or multiple owners from this charge, locate their name from the list and check the box to the left of their name.

A/R Type- Limits the Recurring Charge to accounts with the specified A/R Type. For example, a Recurring Charge can be set to include only accounts in Attorney status. Select the appropriate account from the lower A/R Type pool and click the up arrow to move the selected A/R Type(s) to the pool of A/R Type to which the charge does apply.
NOTE- The Include All A/R Types box checked will populate the charge with all existing A/R's for that association. Available for all options in the Apply To field.

Limit to Past Due Accounts- Only accounts that have a past due balance are eligible for the charge. The past due balance is based on the open (ie. unapplied) amounts on the owner.
Min. Amount- Specify a minimum amount that should be met before the charge will apply. This minimum amount is compared to the open balance for each account.

Start Date- To be used when Auto Process is selected. Enter the date on which this Recurring Charge will begin.
End Date- To be used when Auto Process is selected. Select a number of occurrences, a Date for the charge to end, or leave blank if the charge will recur indefinitely.
